Make sure you've checked out our article on Customizing your business 3 key vault for your organizational needs to get an idea how how you would like your vault to be setup. If you're ready to set up your vault, check out the instructions below.
Setting up a Standard 3-Key Vault (3KV) and assign team members for signing transactions
Please note: The terms Team Signers and Key Managers are interchangeable and synonymous.
First, assign the team members.
- Access Vault Settings: Open your Casa app and navigate to the vault setup. Tap on Set Up in the middle of your vault. Then tap on the customize tab on the top right and select Add A Key Manager.
- Label Your Team: Create a team name to organize and identify your team signers [key mangers]. This helps differentiate teams if you’re managing multiple vaults (ETH, BTC, etc.) with different key managers

- Add Team Signers [Key Managers]: Make sure you use an email they can access securely and is associated with your organization or company.

- Toggle On: The team member can create transactions and sign them.
- Toggle Off (default): The team member can sign transactions but cannot create them.
Once configured, your key manager will receive an email to connect their key.
Now we are ready to setup your vault
If you’re ready to set up your Casa Business vault and need step-by-step instructions for initializing your device, visit our support guide here:
This resource provides detailed instructions for setting up various hardware wallets, ensuring a smooth and secure onboarding process.
Set up your Casa Business vault with 1 Mobile Key and 1 Hardware Wallet:
No need to set up both BTC and ETH vaults if you are only using one, just set up the vault(s) you intend to use. You can always come back and set up the other vault if your strategy changes.
For now, only set up your Mobile Key and Casa Recovery Key. In the next section, we'll walk through setting up and designating your hardware key to your Key Manager/Team Signer.
Follow these guides for detailed steps on setting up your Mobile Key and Casa Recovery Key:
🔗 Setting Up Your 3-Key Vault for Bitcoin (BTC)
🔗 Setting Up Your 3-Key Vault for Ethereum (ETH)
📌 How to Invite your Key Manager:
1. Tap on Setup Hardware Key in the Casa app.
2. Select your Key Manager from the list and tap Save.
3. Casa will send them an email invitation with instructions on how to connect their key to the vault.

Once your Key Manager connects their hardware wallet to the vault, you can to tap on their key in your [the vault owner] Casa app and see it is active. Congratulations setting up you vault! Now you have the option of swapping your Mobile Key for a second Hardware Key, if thats what works best for your business.
Replacing your Mobile Key with a Second Hardware Key:
Currently, using two hardware wallets is supported exclusively for Bitcoin (BTC) vaults. Ethereum (ETH) and Stablecoin vaults only support 1 hardware key.
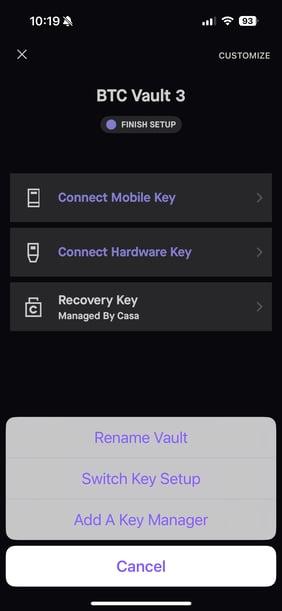
- Tap on the customize tab on the top right and select Switch Key Setup.
- Tap on Yes, Continue:

Tap on Continue, I have both devices:

Tap on Send Key Connection Email:

You'll now receive a fresh email with instructions on how to add and connect your 2nd hardware wallet.
![]() Pro tip: The Casa Recovery Key has a 7-day security delay between when you request use of the key, and when the transaction is signed by Casa. Therefore, if you lose/misplace a key and need execute a time sensitive transaction, we will not be able to sign until 7 days after your request.
Pro tip: The Casa Recovery Key has a 7-day security delay between when you request use of the key, and when the transaction is signed by Casa. Therefore, if you lose/misplace a key and need execute a time sensitive transaction, we will not be able to sign until 7 days after your request.
The way around this is to import the seedphrase of your hardware wallet (doesn't matter which one if you have two) into another device and keep it in a geographically distinct, secure location. This effectively clones your Casa Hardware Key, which can then be used to sign transactions before the 7-day delay if you ever lose the original key.
If you have any questions or need further assistance, don’t hesitate to reach out to our support team at: help@team.casa!