This article details how to perform Sovereign Recovery for bitcoin assets held with Casa. Please see Sovereign Recovery instructions for ethereum if you need to recover ethereum.
What You'll Need
In Sovereign Recovery, you should operate on the assumption that the Casa Recovery Key is unavailable to sign [due to not having access to its private key] but you can still find its public key in the Casa app and the Sovereign Recovery email we sent you when you created the vault. This means:
- For a 3-Key Vault:
- You’ll have 2 of your 3 private keys remaining.
- To recover funds, you need:
- All 3 public keys
- Any 2 private keys to sign a transaction
- For a 5-Key Vault:
-
You’ll have 4 of your 5 private keys remaining.
-
To recover funds, you need:
-
All 5 public keys
-
Any 3 private keys to sign a transaction
-
-
If you are using the same YubiKey for both your BTC and ETH vaults please ensure to safely save and store the (Offline Backup) seed phrase for each vault.
To sign, you will need both of your hardware devices. If you have a mobile key, you'll need to export the seed phrase from your Casa app .
Finding your public keys:
You can retrieve the public keys from your hardware wallets by connecting the devices directly to Electrum (see detailed instructions below).
Additionally, all of your public keys are accessible within the Casa app. To find them:
-
Open your vault screen.
-
Tap the key icon. (top-right corner)
- Select the key you wish to inspect (ex. Mobile Key, Home Key, Safe Key, Office Key)
-
Select “View Public Keys.”
-
Select “BTC Account.”
For added redundancy, the public key for your Casa Recovery Key is also included in the Sovereign Recovery email we provide.
Below is a visual walk-through of how to view the public key and derivation path for your Mobile Key:
-portrait.png?width=226&height=445&name=File%20(29)-portrait.png)
-portrait.png?width=226&height=445&name=File%20(30)-portrait.png)

Don't forget to copy the derivation paths. When you view the public key for a specific account on a device, the current derivation path will be displayed beneath it. Derivation paths change every time you rotate a key and generate a new keyset in Casa; it’s important that you use the current path, otherwise the wrong addresses will be generated by your recovery wallet software.
IMPORTANT: Your public keys are stored locally on your iOS or Android device. This means they can be accessed even if Casa’s infrastructure is unavailable, and even if your device does not have an active internet connection.
To ensure you're able to log into your Casa app to access your public keys even if you’re offline, just be sure the "Clear Cache on Logout" option is DISABLED on your Settings tab. If Casa's system is down for maintenance, you may need to place your device into airplane mode to access Casa in this "offline" mode.
Recovering funds without using Casa software or servers
Install Electrum
- First, install Electrum 3.2.3 or later: https://Electrum.org/#download
- IMPORTANT - Electrum 4.0.0 or later is required for Coldcard support
Additional instructions within this box for Linux users ONLY:
Install the appropriate libraries for your hardware wallets via the CLI:
If you use a Trezor:
Set hardware wallet udev rules:
- For Trezor - https://trezor.io/guides/trezorctl/udev-rules
- For Ledger - https://support.ledger.com/article/115005165269-zd
- For Coldcard - https://raw.githubusercontent.com/Coldcard/ckcc-protocol/master/51-coinkite.rules
After setting the udev rules for the first time, reboot your computer.
Set up your 3-key vault:
- Run Electrum. For testnet, run
Electrum --testnet
- Create a new wallet and give it a name

- Choose "multi-signature wallet"

- Select "From 3 cosigners"
- Select "Require 2 signatures"

- Click next
For cosigner 1 of 3:
- Select "Use a hardware device"
- Plug in your first hardware device and enter your PIN to unlock it

- Click next
- Select your hardware device and click next.

- Select "p2sh-segwit multisig"
- The derivation path should change to something like m/48'/0'/0'/1' - replace it with the derivation path from the Sovereign Recovery email we last sent you, which will look something like: m/49/0/0

- Enter your passphrase is you set one up. If not, leave the passphrase fields blank and click "Enter Passphrase"

For cosigner 2 of 3
If using the mobile key as one of your Casa keys (default setup, most people use this):
- Choose "Enter cosigner seed"

- Enter the seed phrase the you exported from your Casa app
- Click OPTIONS > BIP 39 SEED

- Click "Next"
- Enter your unique derivation path found in your Sovereign Recovery email

- Click "Next"
If using a second hardware device in place of the mobile key, follow the same as you followed above for "Cosigner 1 of 3." Those instructions again are:
- Choose "hardware wallet"
- Plug in your second hardware device if it isn’t already
- Click next
- Select your hardware device and click next
- Select "p2sh-segwit multisig"
- The derivation path should change to something like m/48'/0'/0'/1' - replace it with the derivation path from your recovery data, which will look something like: m/49/0/0
- Click next, then next again on the master public key screen
For cosigner 3 of 3
- Choose "Enter cosigner key" and click next

- Paste the "Casa Recovery Public Key" for the appropriate account from your recovery data

- Click next
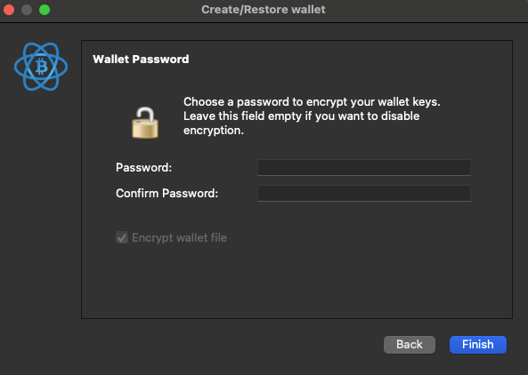
- On the password screen, leave both fields blank and click "Finish".
Electrum will now initialize your wallet and display all the transactions that have been received and sent by it. If your transactions don't show up after a minute or so, something went wrong during the process and Electrum derived the wrong set of addresses.
To send your assets to a new wallet, click on the "send" tab and fill in the "pay to" field with an address owned by your new wallet. Click the "max" button to sweep all of the value out of the wallet, and slide the "fee" bar to an appropriate fee depending upon your urgency. If your wallet contains many UTXOs (over 100) then you may encounter memory issues with your hardware device trying to send them all in one transaction; instead try sending smaller numbers of UTXOs in multiple transactions.
Once you click "send," you will be prompted to confirm the amount and destination address on each hardware device.
Upon completing the second signature, the "broadcast" button will no longer be greyed out. Click "broadcast" and then copy the transaction ID into a block explorer to check that the transaction has propagated across the network.
NOTE: Electrum can be finicky with hardware device signing support, especially on Linux. In order to prevent errors, ensure that you only have ONE Electrum instance running and plug both of your hardware devices in simultaneously rather than plugging and unplugging the devices as you sign.